Back from the dead, it's Baby TheEnd with a new gunpla review! Today I'll be talking about the HG Exia kit, specifically the Repair II version that makes its grand appearance at the end of the last episode of season 2 of Gundam 00. After Ribbons Almark steals one of 00 Gundam's GN Drives and transplants it into 0 Gundam, Setsuna takes the other drive and pops it into the new and improved Gundam Exia. Enough spoilers though, on to the review!! :O
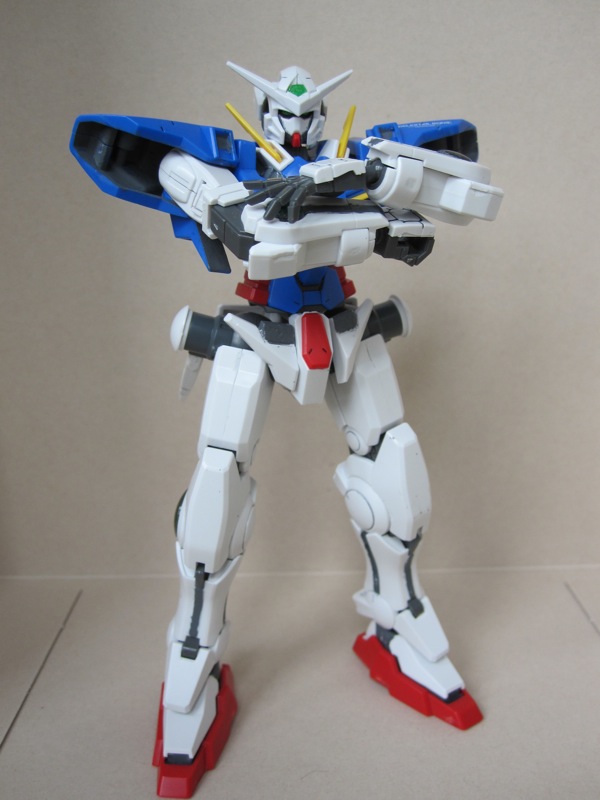
I really like the way Exia ReII looks. There are no more goofy light purple GN Strips everywhere, and Exia now only carries two beam sabers, and the GN sword has been upgraded to GN Sword Kai [more on this later though]. I painted Exia ReII up so I wouldn't have to use the foil stickers, because foil stickers make me very sad.
In terms of articulation, despite the fact that this fella was one of the later HG 00 kits produced by Bandai, all they did was include a new runner with the ReII parts for Exia. From the top down, the head is on a double joint and can move around quite nicely. The shoulder antennae can move up or be stored in the little compartments. The shoulder joint mechanism is kind of cool, as the chest vents/sides of the body move around in addition to the shoulder armor and arms. The shoulder armor is attached to the top of the arms, and can move around pretty nicely. The arms can move at the shoulder, and quite well at that. They also rotate just above the elbow, and the elbows are only single jointed :(. The hands, as usual, are ball jointed and can move around a whole bunch. The waist really can't do much, only being able to turn left and right a bit. The front skirt armor is separate and can move and, for the most part, not inhibit leg movement. The back skirts are molded as one piece, and absolutely cannot move. The hip connection to the legs is quite good, but I don't like the joint they used as it can be kind of fiddly sometimes and not want to have both of Exia's legs at the same level. The legs can rotate at the hip connection, but are blocked by the beam sabers attached to the hips [which I glued on, because anime accuracy is important to me :P]. Exia's legs are double jointed at the knee as well as the ankle, and the front ankle armor can move around just a little bit.
Like I said before, I really like how the ReII version looks because there are no more GN Strips. Where the beam saber mounts on the original Exia once were are now thrusters, and the beam sabers are attached to the GN blade mounts. Also included in the kit is a GN Drive in full burst mode, which is, like the hip mounts, permanently attached to Exia ReII's back.
This fella is pretty posable, though I wish the front ankle armor and the elbows were a bit more mobile :|. And even for being a HG, Exia ReII is very color accurate to the show, which is very nice since it required minimal touch-ups on my part :D
~*~ACCESSORIES~*~
Because HG Exia ReII doesn't come with any beam effects, I decided to skip over the beam sabers. And let's face it, the beam sabers are kind of overshadowed by Exia's shiny new GN Sword. So, here's the GN Sword Kai [custom]~
It's pretty much the exact same as Exia's original GN Sword [it even attaches just like the GN Sword I], but this time the blade, like 00 Gundam's GN Sword III, is made from the same material as the GN Condensers [the green bubbles on Exia] and is much more powerful than previous iterations of the GN Sword. On the actual HG kit, it looks very nice. My only complaint is that the swing mechanism that allows you to bring the GN Sword forward can be kind of loose sometimes, so it'll sag a bit. Nothing a little super glue can't fix though >:3
I decided against building the shield because, once again, anime accuracy is important to me :D
~*~FINAL VERDICT~*~
For a price tag of ~$12, Exia ReII is definitely worth the money. It does away with having to deal with four fiddly beam sabers, two GN blades and a shield, and you're left with a single badass GN sword and two beam saber hilts you could honestly glue onto the mounts. It's a very nice looking kit, and if you like Exia then the ReII version is definitely a must have. Even for being a version of Gundam Exia, it feels somewhat different. He's fun to play with and looks pretty action-y too, and I'd definitely recommend Exia ReII to someone as it's not that difficult of a kit either! :D [then again, I'd recommend Gundam 00 kits to
anyone...]
And with that, the review is over! I'll be keeping a real schedule again, so I'll see y'all next week~


Good to see you back, man!
ReplyDeleteWhile I don't care much for the GN stripes on the shoulders, I kind of miss the GN stripes on the thighs, because they break help break up the large patch of white on Exia's legs, which now look a little flat without it.
By the way, you forgot to paint the yellow bits of Exia's face vents =P
Aye, I don't have any yellow paint so I had to skip that, but I should be getting some soon and then I can touch it up :D
ReplyDeleteBaby TheEnd I could really use your help! I recently purchased HG's of this model and of 0 gundam. I want to make them look great- like how you make your models look. what clear paints did you use for the green parts? what did you use to apply it? did you need to use any paint thinner if so what did you use how did you use it and what did you mix it in? how many layers of the clear paint did you apply and how many layers of top coat? what do you use for panel lines? and what tools do you use?! your models seem to have no trace of nub-marks left! how do you do that?! I'm sorry to post such a long comment and ask so many questions..I'm just quite new to gunpla and could really use some help.
ReplyDeleteyou can use clear green sharpie marker or tamiya clear green
DeleteI'm sorry for the double post but I forgot to ask do you use some kind of mask if you use spray paints?
ReplyDeleteWow, quite a post o__o
ReplyDeleteFor the clear green parts, I use either a green sharpie marker or Tamiya X-25 (Clear Green) paint. I don't use any paint thinner, and for the clear paint I just paint it on until it looks evenly distributed throughout. For panel lining, I use a regular ol' Gundam Marker and use an eraser to get rid of excess. As for tools, I use one of these [http://thumbs.dreamstime.com/thumblarge_544/1286201174413czr.jpg] and some plastic cutters, which are often referred to as nippers. I just nip the parts off the runners, leaving a little bit of the gate left on the part. I then nip off the remaining gate parts, and try my best to shave off excess plastic with the knife ^__^
12 DOLLARS!!!
ReplyDeletei paid 16 directly from the distributor, on sale.
where do you get these things?